How to measure current draw

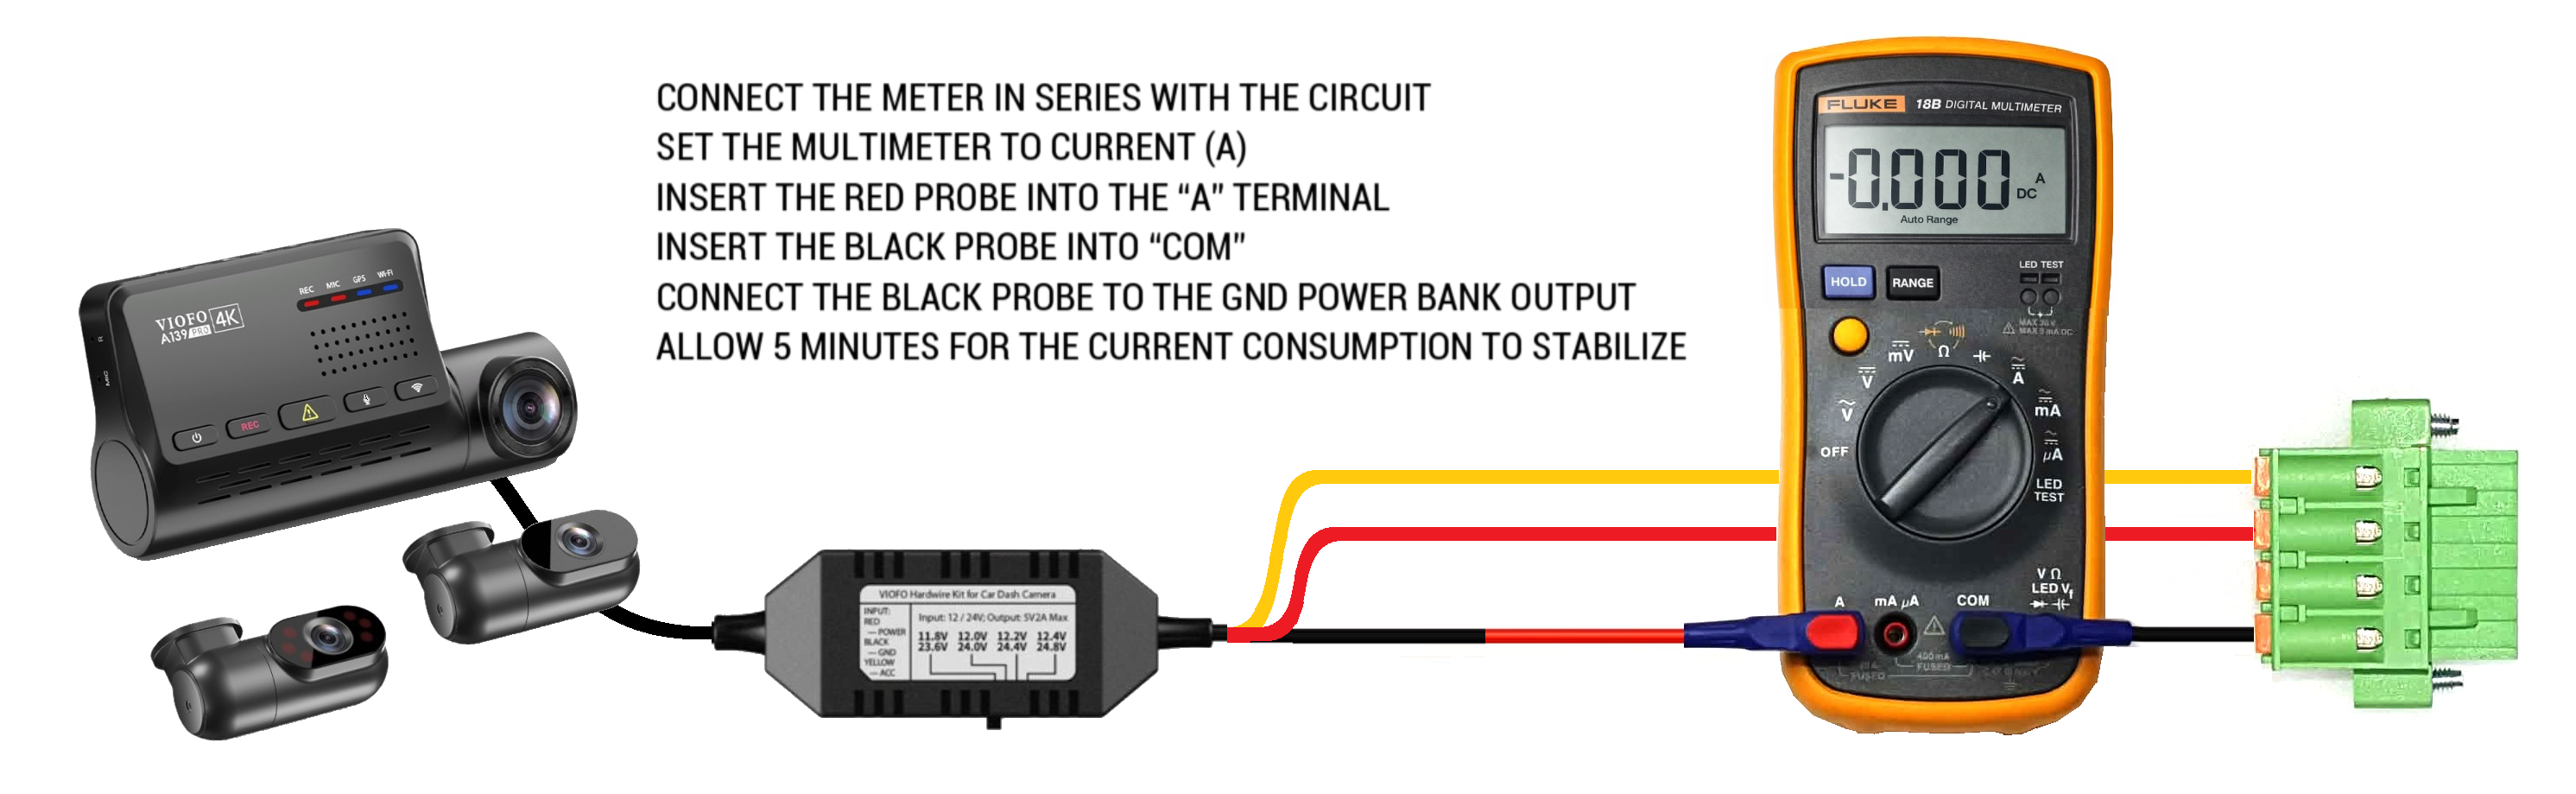
Click the image to open a larger preview and see how to measure camera current draw with a multimeter.

Warning: Never measure current the way you measure voltage. A meter set to current must be placed in series with the load. Do not connect it directly across the power output, as this may blow the fuse inside the meter or damage the equipment.

How to connect the meter correctly

  1. Set the multimeter to current measurement mode (A).
  2. Move the red probe to the current input terminal on the meter.
  3. Keep the black probe in the COM terminal.
  4. Break the positive or ground line so the meter can be inserted into the circuit path.
  5. Connect the meter in series, not in parallel.
  6. Power the camera and let the system stabilize for a few minutes before reading the value.
  7. Use the measured current value in the calculator below.
  8. After measuring current, move the red probe back to the voltage terminal to help prevent mistakes during future voltage checks and avoid possible multimeter damage.
Runtime calculator

Select product and output voltage to estimate camera operation time.

Input values

Select a Power Core product and output voltage. Capacity is filled automatically.

Choose the battery module you want to calculate.
Choose which output your camera is using.
Auto-filled equivalent capacity for 22000LFP @ 5V.
mAh
Use the real measured camera load at 5V.
mA
Helpful examples for typical 5V dashcam loads.

Estimated result

This is an engineering-style estimate, not a guaranteed real-world figure.

Estimated runtime
125.16hours
Approx. 5 days 5 hours of operation.
Days 5.22
Current draw 450 mA @ 5V
Capacity used 56,320 mAh @ 5V
Selected product 22000LFP
Output 5V
Battery profile 56,320 mAh
Relative runtime scale Extended runtime
The current draw must be greater than 0 to calculate runtime.

Tip: parking mode consumption varies by dashcam model, bitrate, Wi-Fi/LTE usage and ambient temperature.